How to Disable the Windows Firewall
Disable the Windows Firewall in Windows 10, 8, 7, Vista and XP
📒 Note:
Depending on your setup, the Windows Firewall may also be named Windows Defender Firewall. Please treat these names as synonyms.
📒 Note:
Screenshots in this section correspond to Windows 10. Your experience may look slightly different depending on your version of Windows. See 'What Version of Windows am I Running?' if you are unsure which steps to follow.
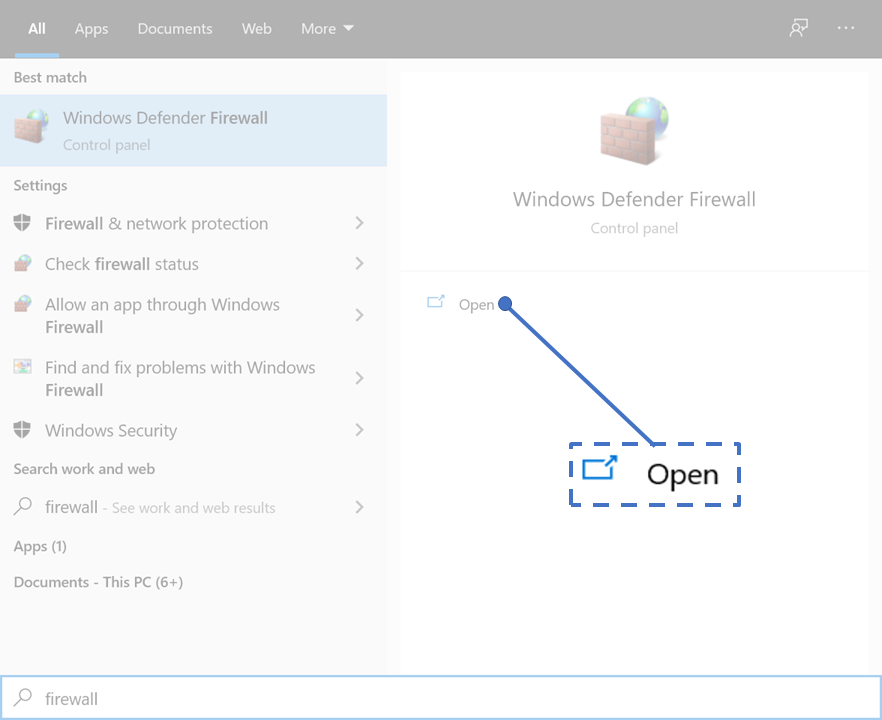
1. Select the Start button and type 'Firewall'

2. Select 'Open' or Hit 'Enter' to open Windows Firewall Settings

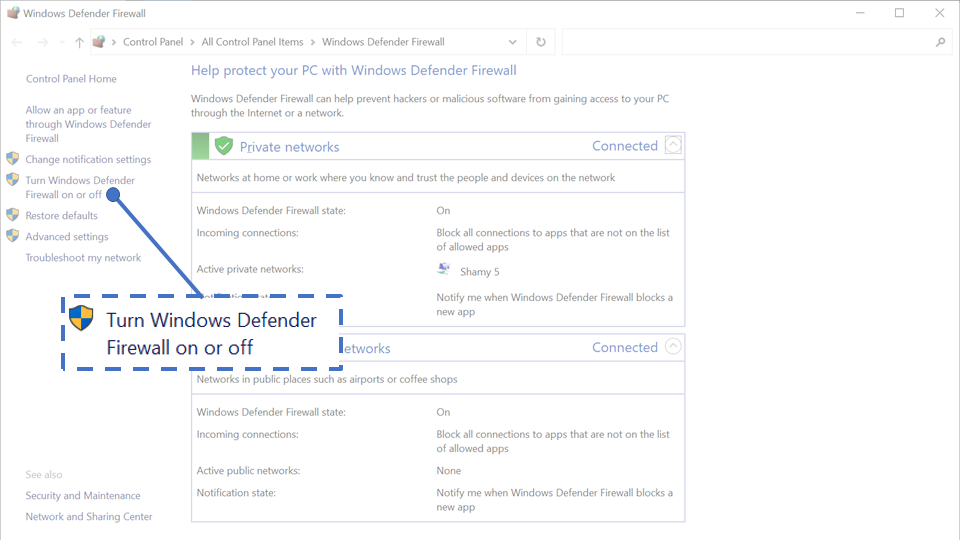
3. Select Turn Windows Firewall on or off on the left side of the screen.

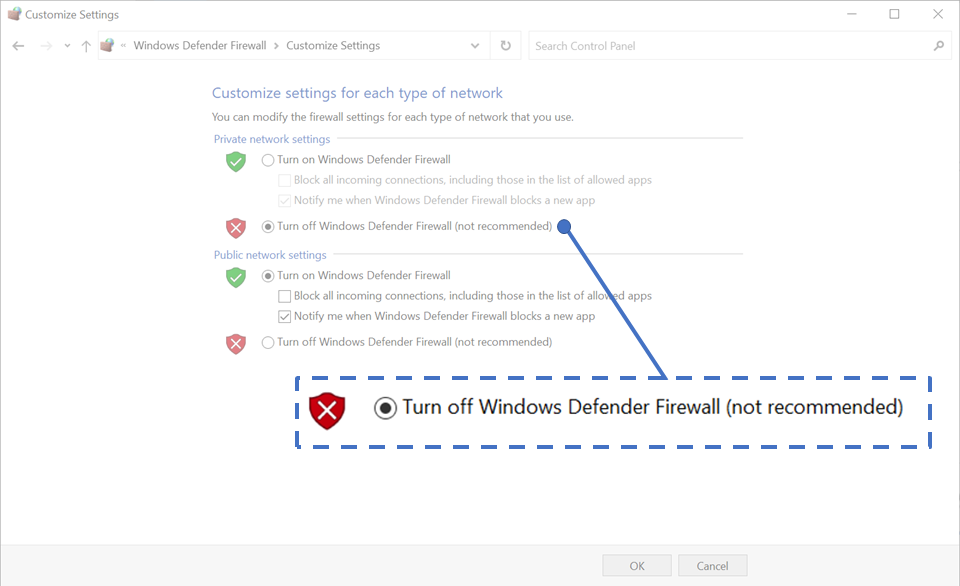
4. Under Private Network Settings, select 'Turn off Windows Defender Firewall (not recommended)'

📒 Note:
You may disable the Windows Firewall for only private networks, just public networks, or both. Most situations will only require disabling the Firewall for private networks.
5. Select 'OK' to save changes.
6. Once you have finished your transfer, be sure to turn your Firewall back on.