How to use PCmover's 'Image & Drive Assistant' method
See steps below for how to use the Image & Drive Assistant to restore your old PC's hard drive or image on your new PC.
- First, you would need to mount the image of your old computer or attach the old drive to the new PC before using PCmover.
Note about mounting the old drive: PCmover cannot read any image type natively. You will need Windows (for VHD images) or the software that made the image (Diskimage, etc.) to mount the image first in order for PCmover to be able to migrate from it.
Backup images that are not a complete image of the old drive or cannot be mounted will not work.
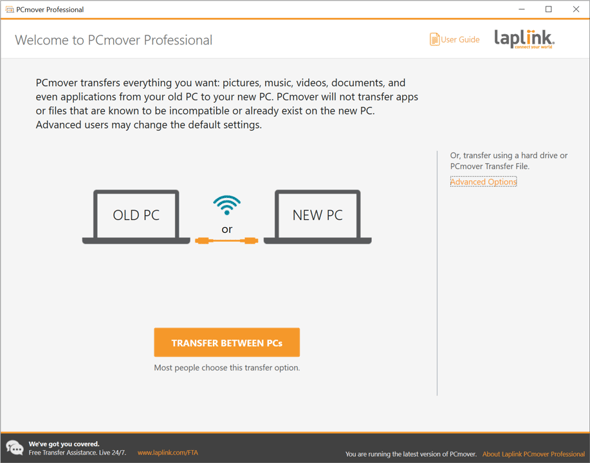
- On the NEW computer, open PCmover and click on the 'Advanced Options' link as shown here:
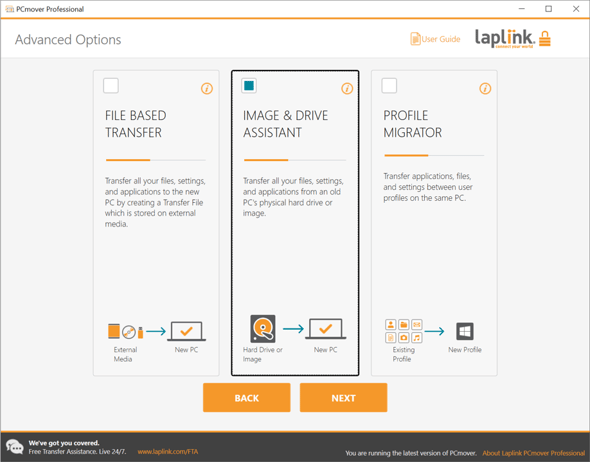
- PCmover will give you three options: 'File Based Transfer', 'Image & Drive Assistant', and 'Profile Migrator' as displayed on this screen. Choose 'Image & Drive Assistant' and click 'Next'.
- Select option 'I am restoring from one image, mounted as a drive'. Click on the 'Browse' button and point it to the root drive letter of the mounted/attached drive. Click 'Next'. In the example below, 'H:' is the mounted drive.
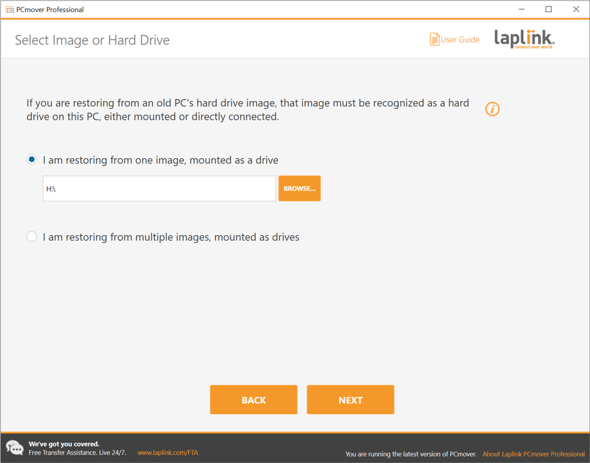
Note: If you have multiple mounted drives, click on 'I am restoring from multiple images, mounted as drives' and first add the locations of all mounted drives. When done, click 'Next'. - PCmover will now analyze the PC. Please be patient as the analysis may take time. Once the analysis has finished and you see the screen below, click on 'Next'.
If instead of transferring everything you wish to customize the Transfer File and selectively choose your applications, files or users that you want to migrate, click on the 'Choose What to Transfer' link as shown on the screen below. For more details about this customization feature, see page 13ff. in the PCmover User Guide.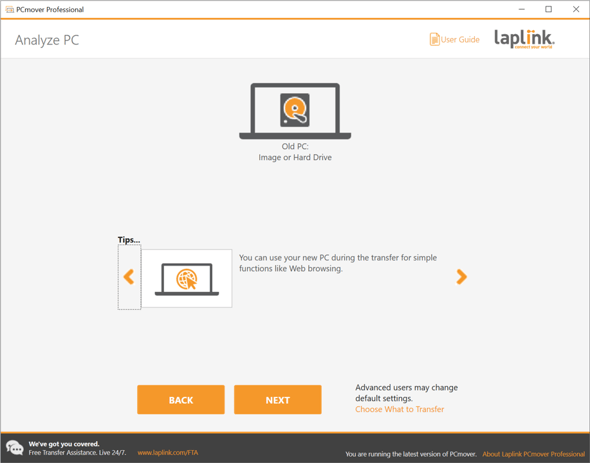
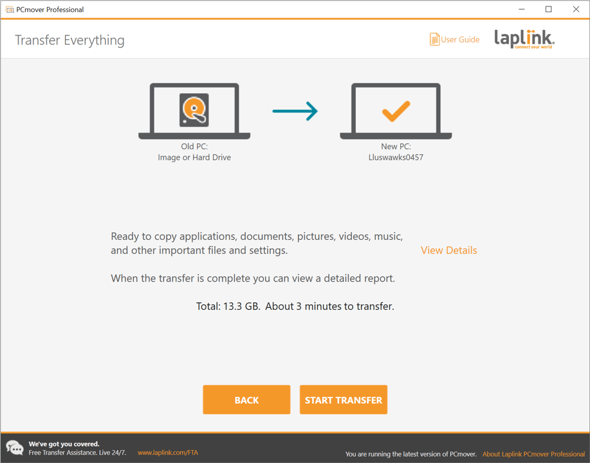
- Once PCmover is ready for the transfer as shown below, click on 'Start Transfer'.
- When PCmover has finished the transfer, close PCmover and reboot the new PC.