How to Disable Norton Antivirus & Firewall
See steps below on how to disable Norton Antivirus and Firewall to complete a blocked PCmover transfer. ///
To temporarily turn off Norton Protection, you need to log on to your computer with an Administrator user account. For Standard user accounts, some of the settings may appear disabled (grayed out).
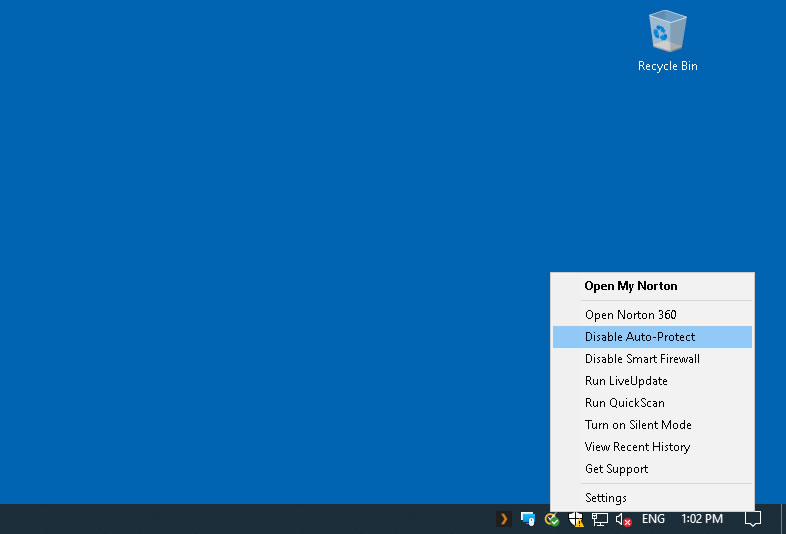
In the notification area on the taskbar, right-click the Norton icon, and then click the following:
Disable Auto-Protect
Disable Firewall
In the Security Request window, in the Select the duration drop-down list, select the duration for which you want to turn off Norton Protection.
Click OK.
Note:
Norton turns its security features back on automatically after the duration that you specified in the Security Request window has been reached. If you want to turn Norton back on manually prior to the end of the specified time period, right-click the Norton icon in the notification area on the taskbar and then click Enable Auto-Protect/Enable Firewall.

For more details and to watch a short instructional video on how to turn off Norton Protection, refer to this Norton Support help article.
Note:
If you prefer to turn off 'Norton Task Notifications' in Windows as an additional option, take the following steps:
Start Norton. If you see the 'My Norton' window next to 'Device Security', click 'Open'.
In the Norton main window, click 'Settings'.
In the Settings window, click 'Administrative Settings'.
In the 'Norton Task Notification' row, move the On/Off switch to 'Off'.
Click 'Apply' and then click 'Close'.