Windows 10 Black Screen After Updating - How to Fix?
In this section, we will present to you the best possible solutions to fix the black screen of death issue on your Windows 10 PC. Each of them would not take more than a minute to complete and have your PC's screen up and running again. Here are the solutions:
1. Try a Windows Key Sequence to Wake the Screen:
With this method, you will enable to computer to refresh the computer screen. It will detect any issue with the display adapter and fix it immediately. Follow the instructions below to perform the solution:
- Once you see the black screen on the computer, do not restart it;
- Please press the Windows key + Ctrl + Shift + B simultaneously;
- Once you do that, you will hear a short beep sound, and the screen will immediately start to dim down;
- You will be able to see the desktop again in no time.
2. Unplug unnecessary USB equipment:
Sometimes after a full operating system update, the PC gets reset and cannot instantly detect outer hardware such as a USB or a wireless mouse. If the USB hardware is still attached to the computer after the update, it may prompt the PC to cause some graphics issues resulting in the black screen. It is wise to unplug all the USB equipment once you see the blank display and restart the computer. You are free to replug the external devices once the screen gets fixed.
3. Update your Graphics Card Driver:
Sometimes, the Windows 10 update does not instantly install the newer version of the graphics driver. If that happens, the screen of the PC could turn black consistently due to an incompatible or outdated graphics card drivers. However, it would take some unusual way to update the driver as you would not be able to view the screen and the content of the computer.
You can complete the job by restarting your computer and opening it under the Safe Mode with Networking environment. Here are the steps to update the driver in Safe Mode. To enter the Safe Mode do as follows:
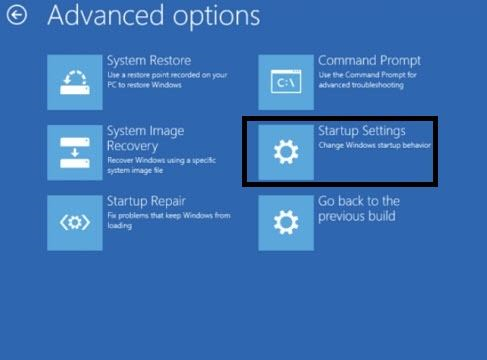
- Enter the Windows Diagnostics by pressing the power button repeatedly and choosing the "Advanced Option" and then click on "Startup Settings."
- Click on "Restart" and click the number 5 key from the keyboard;
- The number 5 key will enable the "Safe Mode with Networking."
- Click on "This PC" icon and click on "Properties."
- On the left side of the display, click on "Device Manager."
- Locate your Windows Graphic Card Driver under the option "Display Adapters" and right-click on it;
- Click on the "Update Driver" option and then click on "Search automatically for updated driver software."
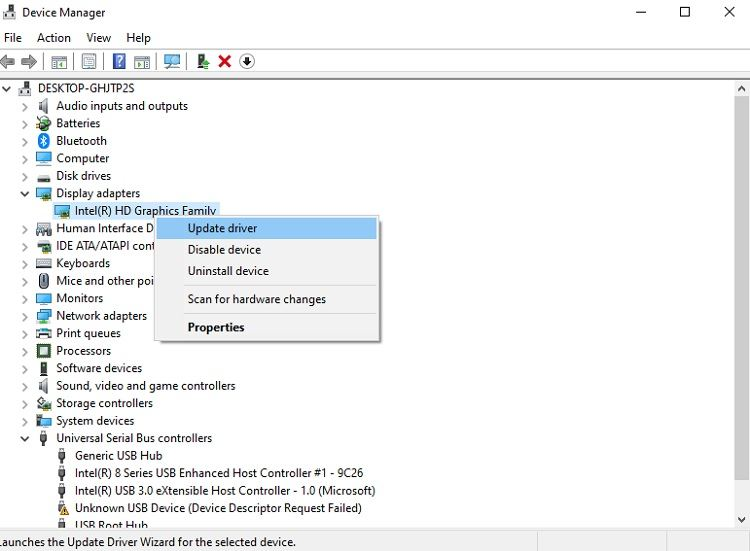
- The interface will automatically detect the newest version of the graphics driver and install it.
Click on "Close" after completing the update and restart the PC to use it in normal mode.
4. Uninstall Third-Party Windows Theming Software:
After a regular Windows 10 update, third-party apps may malfunction and struggle to adapt to the new settings. This sudden malfunctioning could result in the screen turning black and unusable. You would have to reaccess the Safe Mode to perform the activity and follows the steps stated below:
- Under the Safe Mode open the task manager from the Start menu;
- Under the menubar, click on "File" and click on "Run New Task."
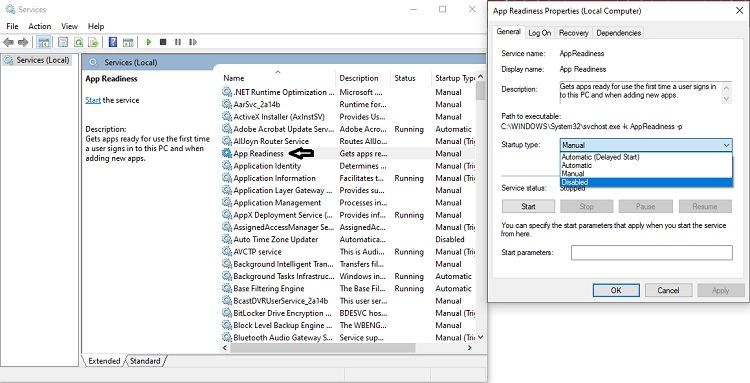
- Enter "services.msc" on the newly opened dialogue box and proceed;
- Double click on "App Readiness" and you will see a new pop-up box;
- Click on the "Startup type" option and from the drop-down menu click on "Disabled" before proceeding forward;
Click "OK" to save the newly established settings and restart your PC.
5. Log in using a Different User Account:
There may be some issue with your login credentials that could be becoming a party in the constant black screen on the computer. You would have to go under the Safe Mode to perform this solution as well, especially if the previous methods do not work. Here are the steps:
- Enable Safe Mode and access the desktop of the PC;
- Enter with your login and proceed to the next step;
- Open "This PC" and enter the following address on the address bar of the display:
C:\Users\Second Account Name\AppData\Local\Microsoft\Windows\Caches. - Copy the newly opened folder and log in again using the old account;
- Access the same folder by entering the same address mentioned above;
- Paste the "Cache" folder and replace the old one;
Restart the computer again to see if the screen is functioning appropriately or not.
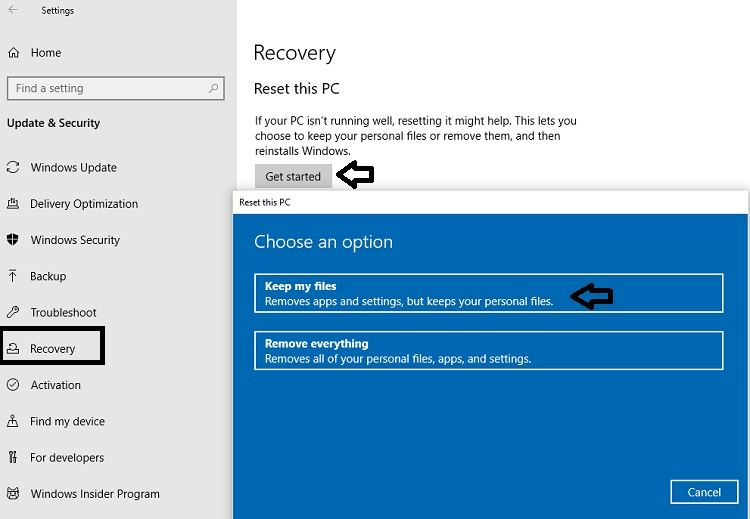
6. Reset your PC
If all the efforts fail to reap any reward, then the best thing you could try resetting the PC and see if it works or not. You would have to enable Safe Mode once again to perform the activity.
- Once you had entered the Safe Mode, enter "Reset from the search bar and proceed to the next step;
- Click on "Get Started" under the Reset this PC option;
- Click on "Keep my files" and follow the instructions of the interface to complete the job.